Home · Bulletin Board · Project Journals · Tech Article Wiki · Knowledge Base · Photo Gallery · Classifieds · Company Reviews · Calendar · T-Shirts
|
Hotrodders Bulletin Board
Home · Bulletin Board · Project Journals · Tech Article Wiki · Knowledge Base · Photo Gallery · Classifieds · Company Reviews · Calendar · T-Shirts |
|
#1
|
||||||
|
||||||
|
TH350 Rebuild Tech
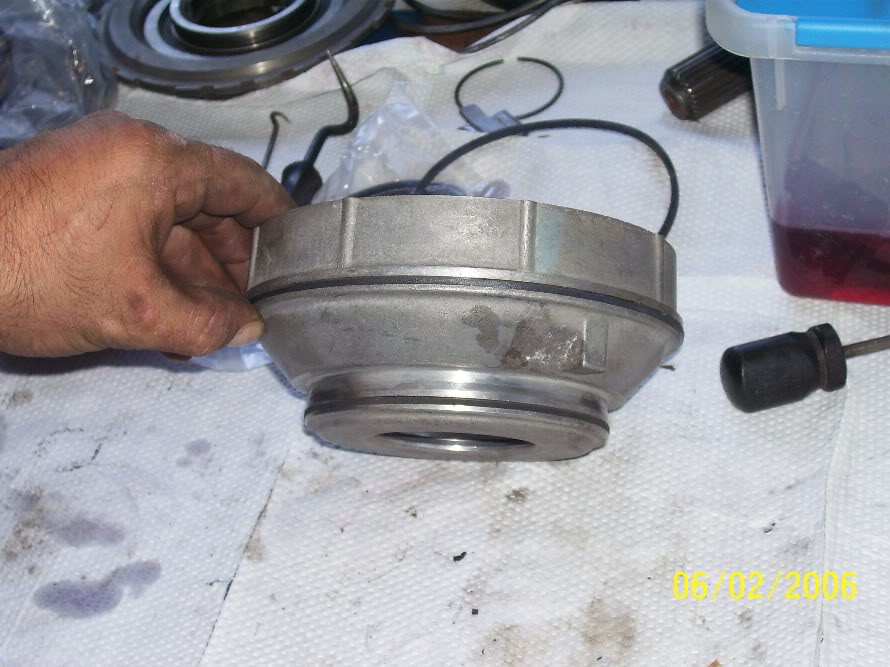
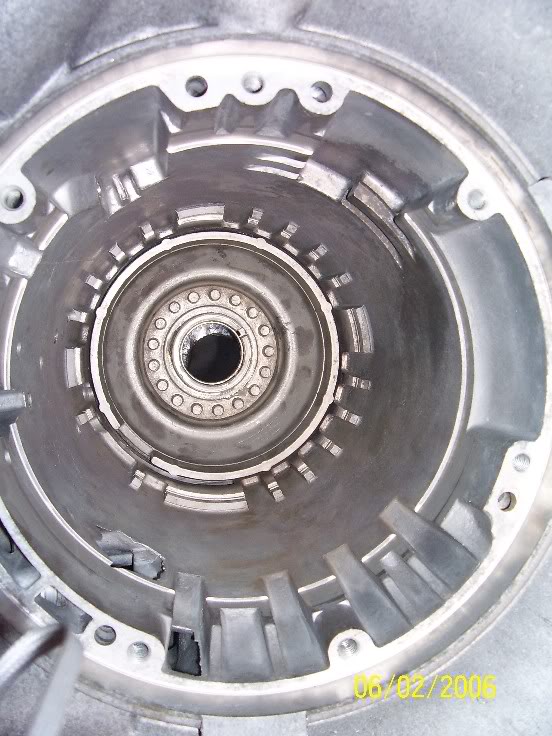
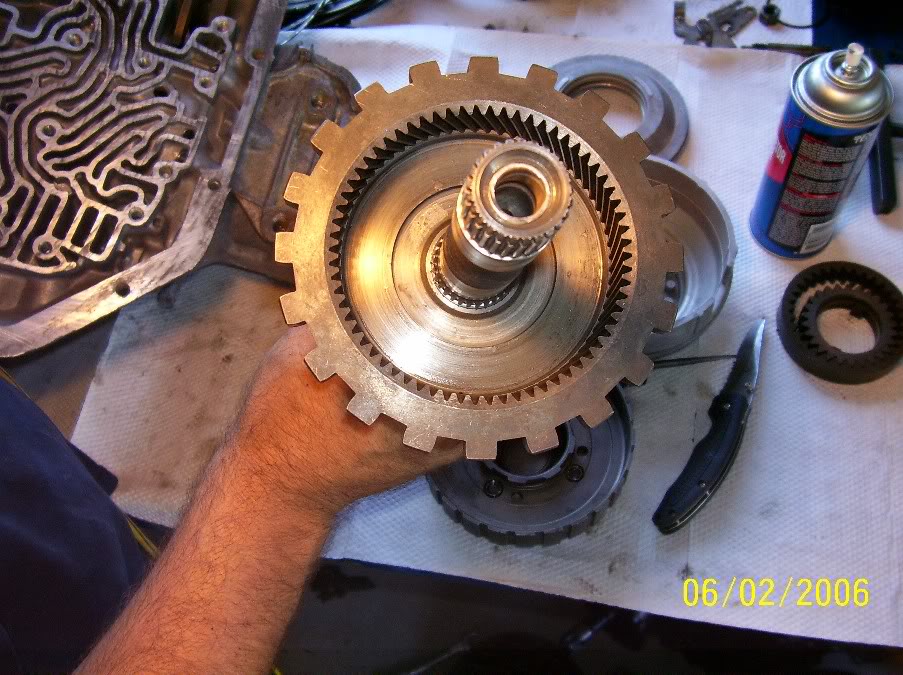
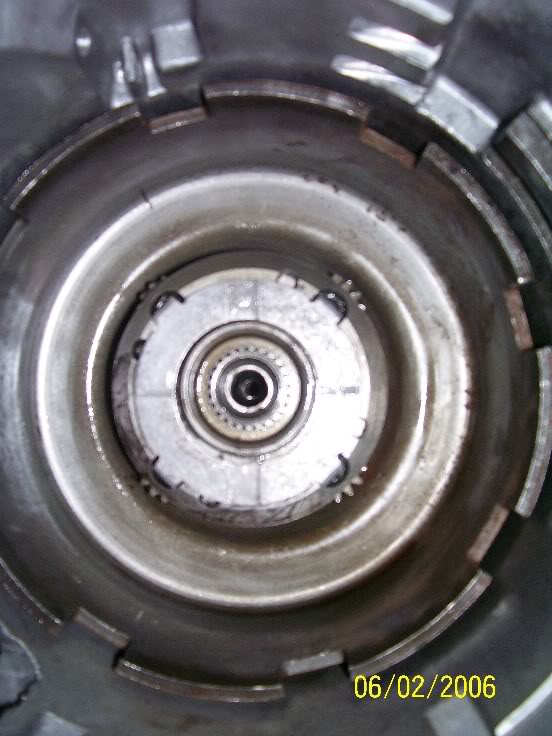
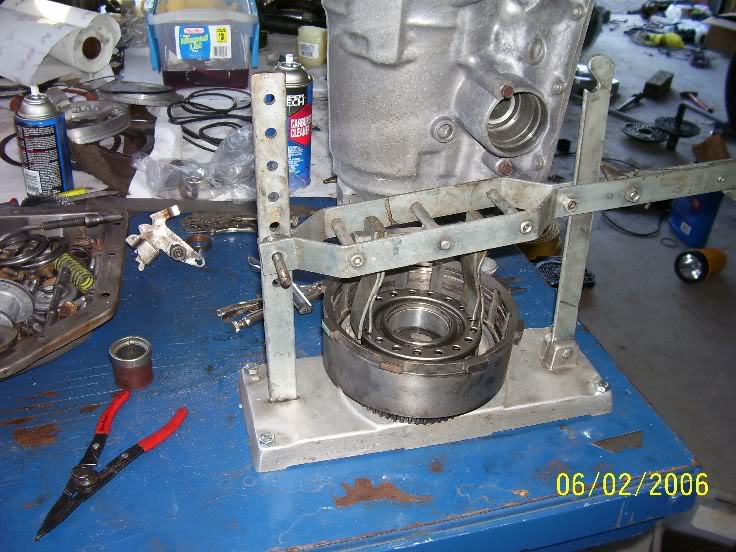
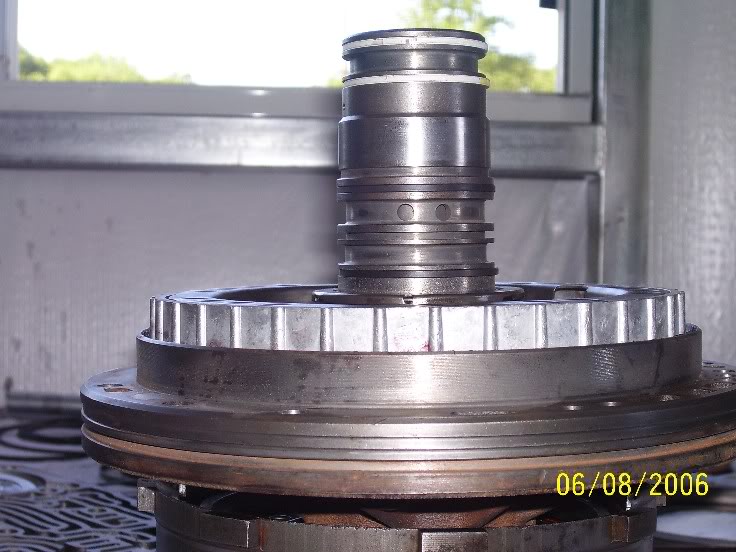
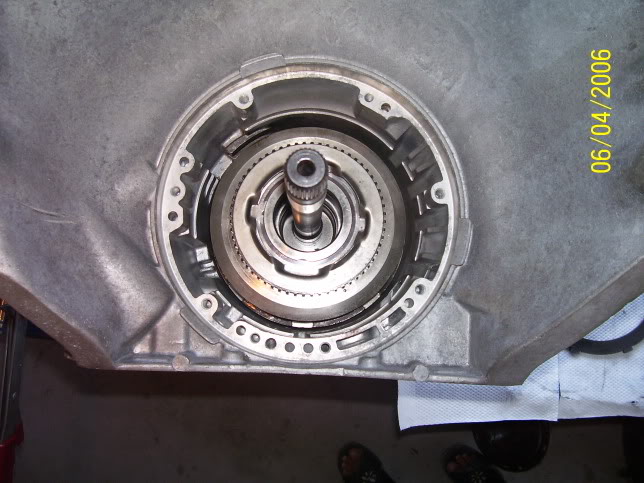
I will be posting pictures and instructions of an actual TH350 rebuild for hi-performance use. I would recommend Ron Sessions book "TH350 Handbook" in the HP Book Series. It has good pictures, alot of good info, but has some outdated info. Outstanding value for the money. there will be some thrust washers I have installed and not taken an individual picture to show it because of bandwidth considerations. I would recommend you get at least 2 additional sun gear bushings individually also. This allows reverse when applied simultaneously with the direct (high gear) clutches, and allows manual low gear when applied with the forward clutches. Manual low gear creates engine braking on deceleration. The low/reverse clutches do not apply in automatic range 1st gear. The low sprag (low roller clutch actually) causes first gear when only the forward clutches are applied. can be deleted, and the feed holes in the case blocked. Then push it into the rear of the case evenly by hand, aligning it properly so it will seat (there is a "tang"). Look at the park pawl notch to help index it. |
|
#2
|
||||||
|
||||||
|
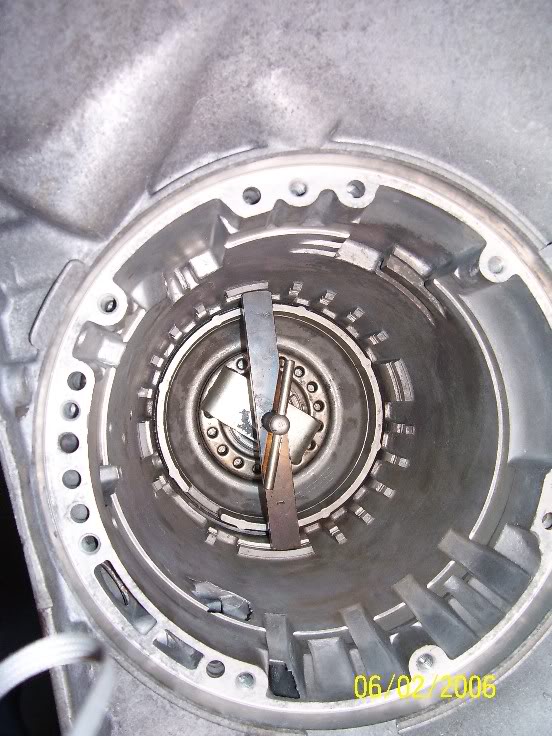
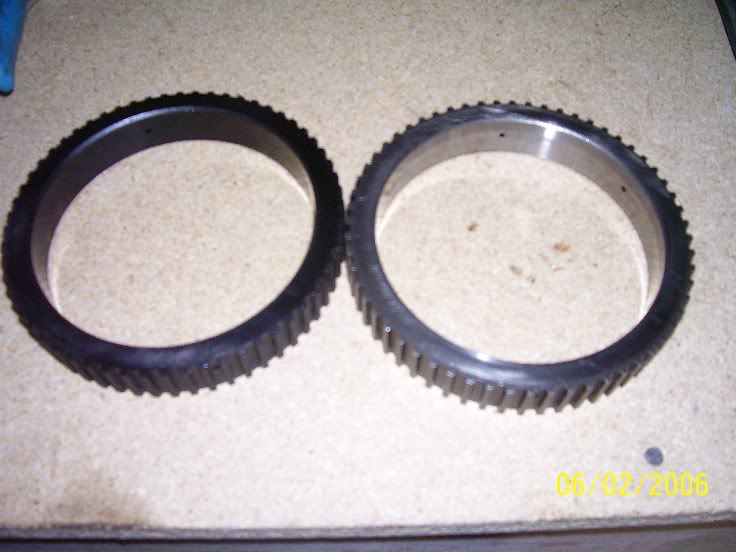
Next goes in the output planet to output ring gear bearing or thrust washer depending on year. will be manually shifted into low for engine braking often, fewer clutches is OK, in some cases, where you are after every lat ounce of ET, using fewer clutches can cause less frictional loss in 2nd and high gear. "Turbulator" steel plates from a 4L60E will also help and are a direct drop-in. for even very high HP cars. A Hi-Energy Borg from a 4L60E is also a good choice. the case-saver is solid and spreads the load over a larger area. Hold in place with assembly gel or vaseline and then install the low support. rear pan area of the worm casting in the case. (Pics later) |
|
#3
|
||||||
|
||||||
|
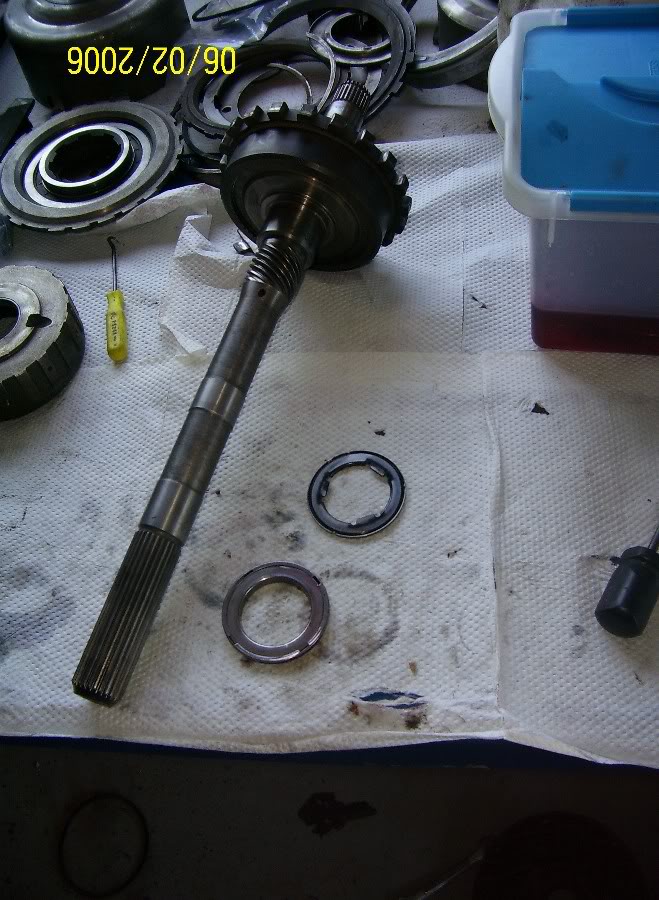
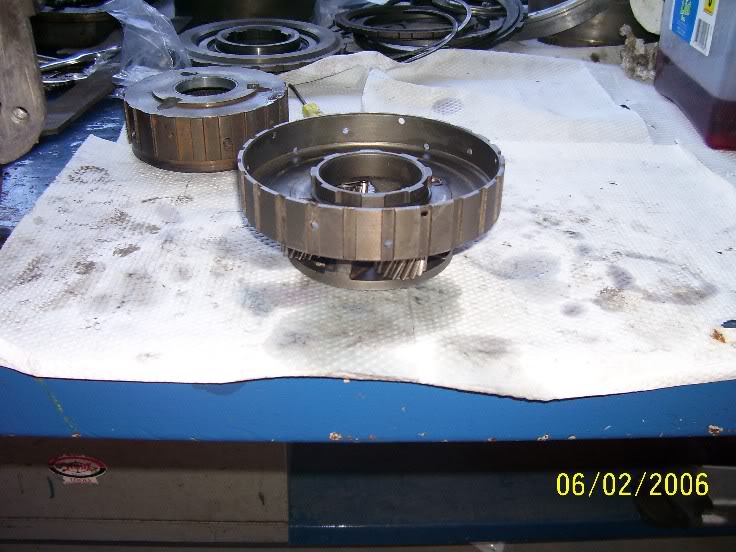
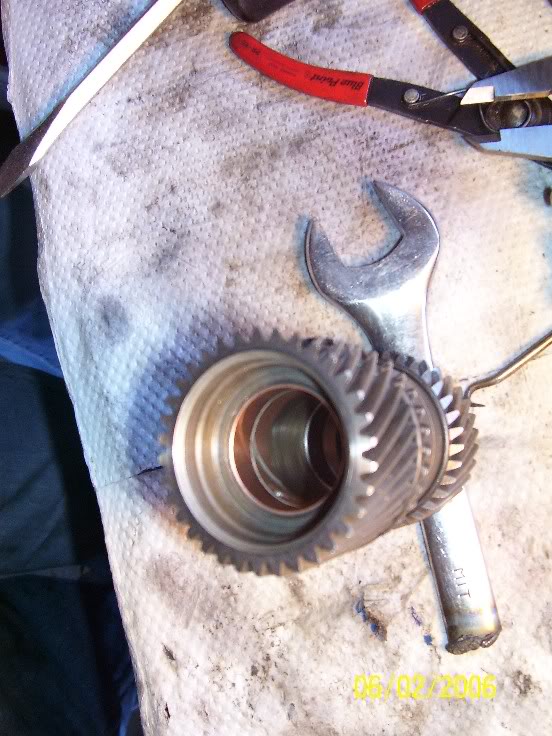
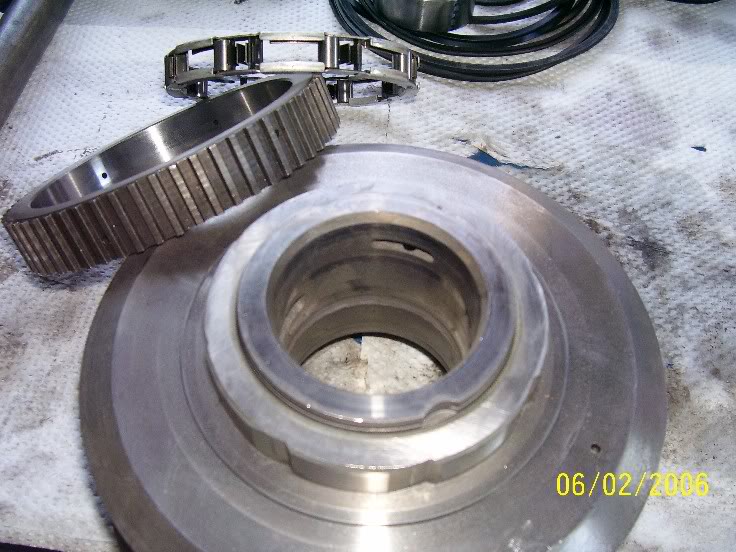
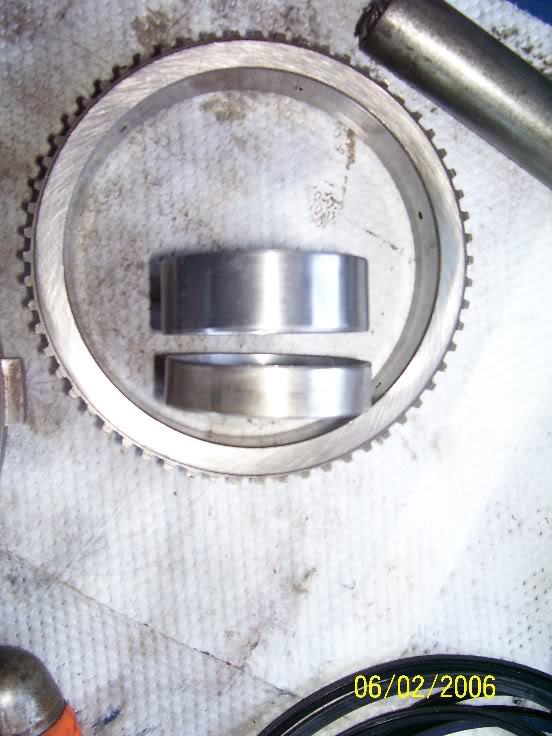
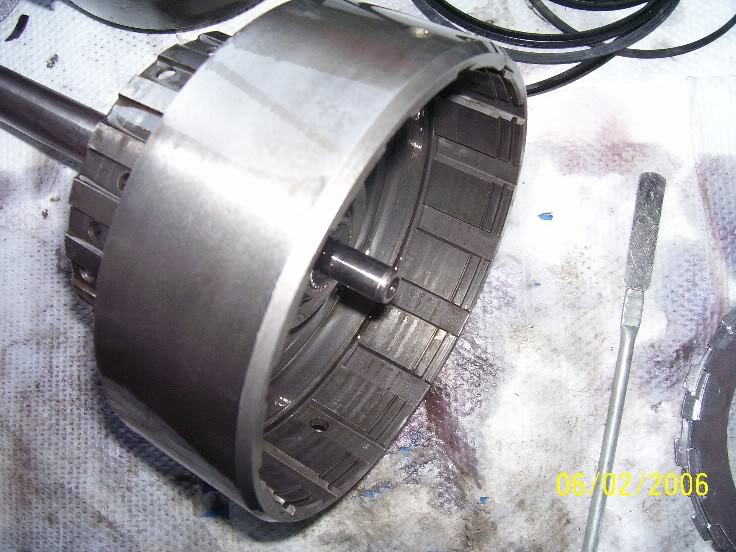
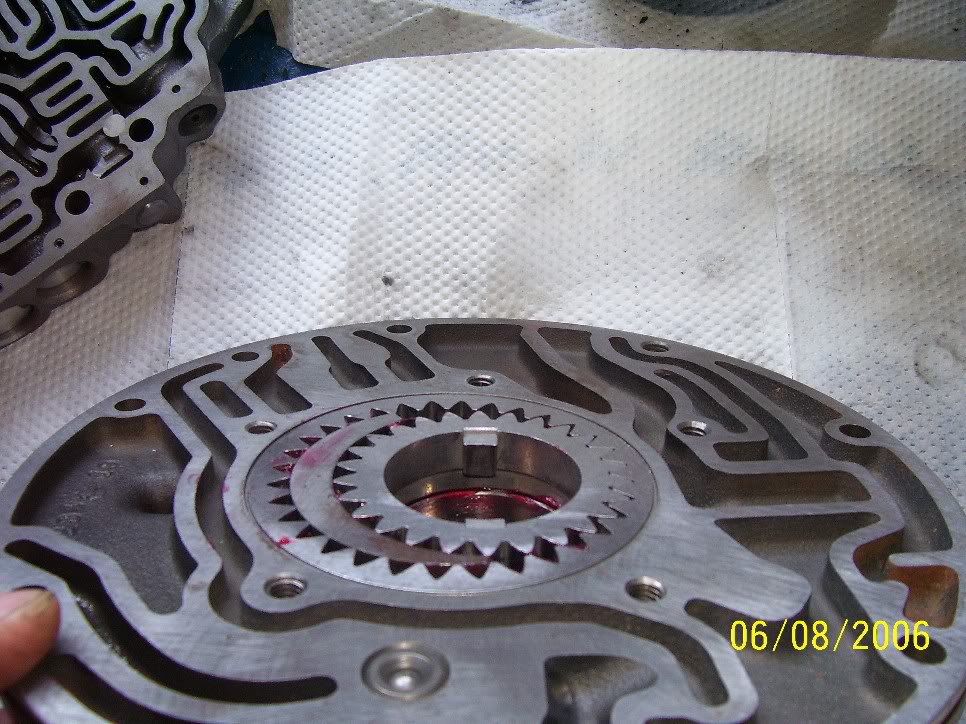
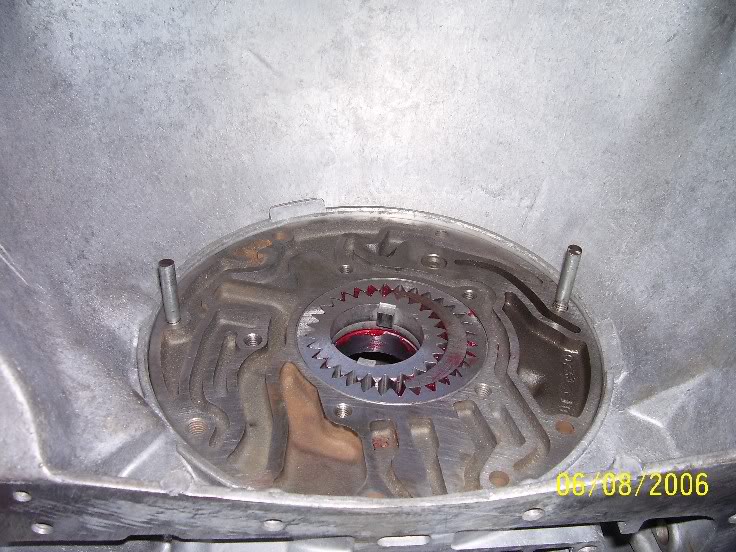
Next you install the 4 tang thrust washer into the large splines of the low sprag inner race, and then the sun shell and gear assembly. 2 on each end, and re-drilled the lube holes. then the regular thrust washer. Then install the small outside snap ring to hold it all in place. and shimming up the output ring gear bearing from the case. 160" to allow for one extra friction and steel plate for a total of 5 frictions, and 5 steels in the directs. This can be accomplished on a brake lathe. I try to keep a few machined on hand, and machine several at a time when I do so. If you need one email me and if you can supply a core, I MAY be able to sell you a piston. and check clearance using a 4 clutch pack, meaure the additonal thickness of the extra friction and steel, then cut the exact amount needed to leave you the exact clearance you desire. Rule of thumb on most auto trans friction clearances is ~.010" clearance per friction. So a 5 friction direct setup would work great with .050" clearance. It will work with less, I wouldn't go less than .040", and will work with quite a bit more, but excessive clearance can result in delayed engagement, busted lip seals, and unsatisfactory shift quality. a 1-2 shift at high rpm. Even more so with harsher shift calibrations. It is the weakest single part of a TH350. based on my experience. is that the springs that force the rollers against the race must be in good condition to helps the rollers grab quicker and more evenly on apply. |
|
#4
|
||||||
|
||||||
|
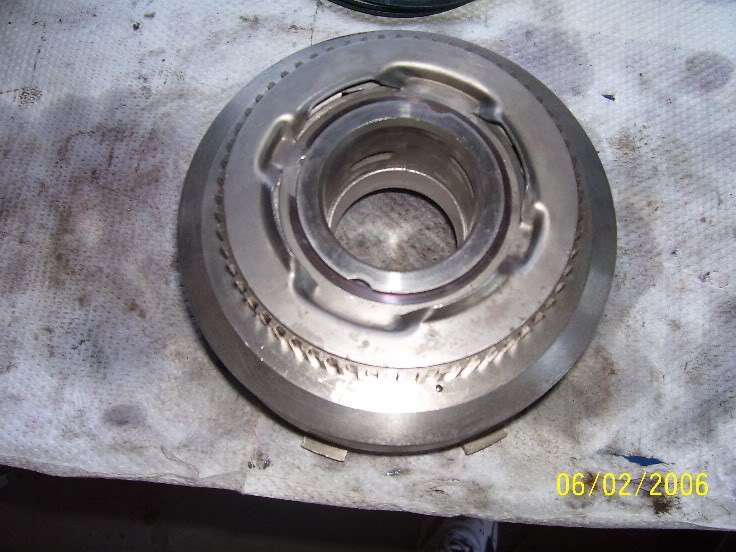
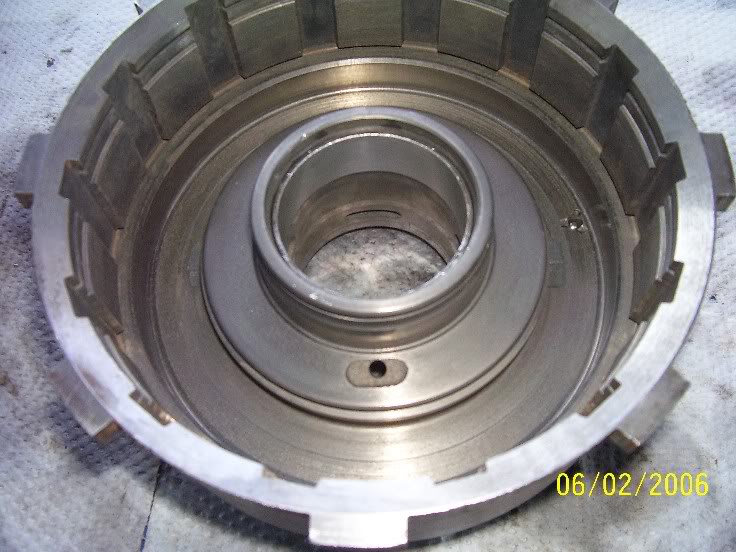
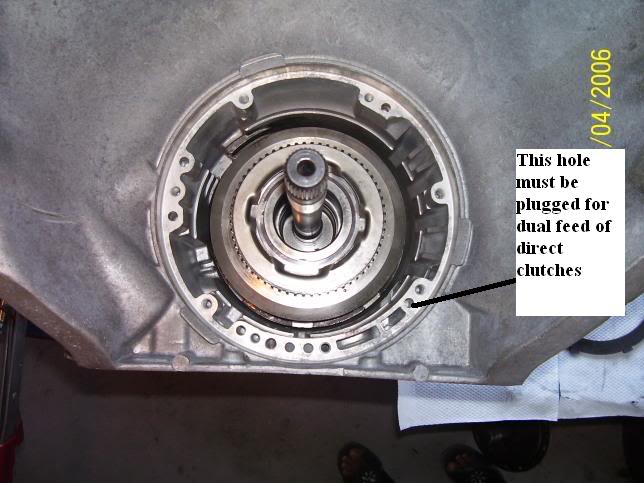
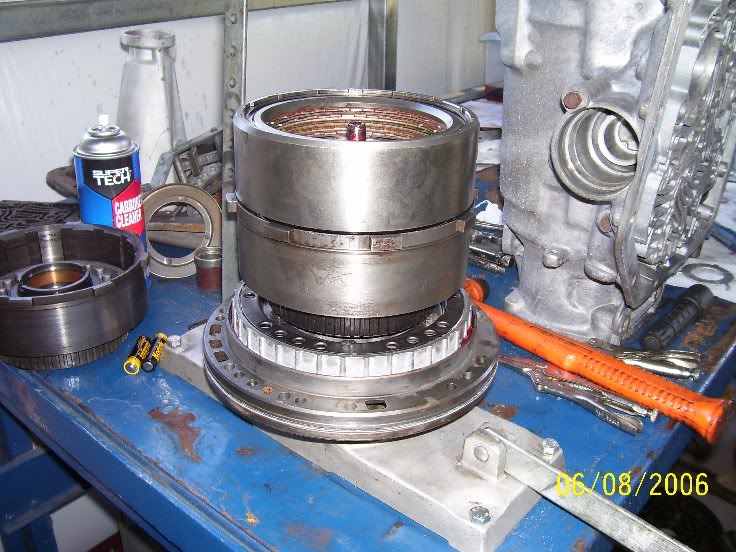
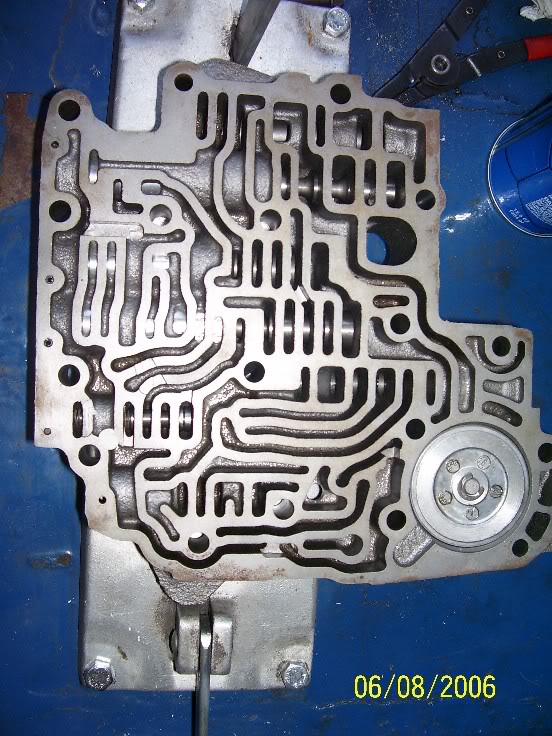
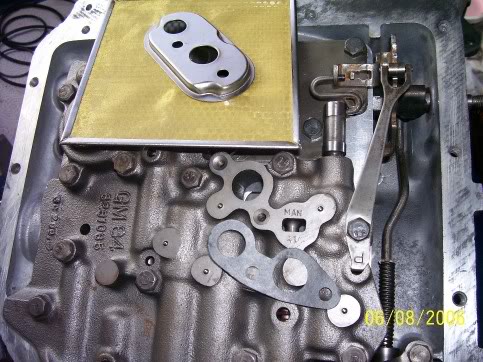
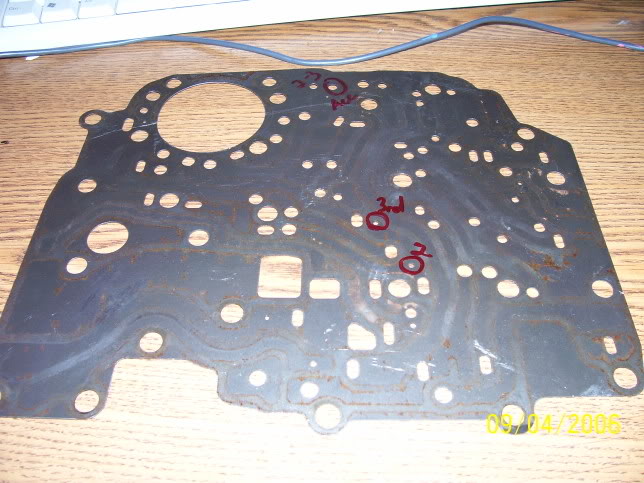
The direct drum should use a wider bushing even on stock rebuilds. Most bushing kits include the wide one. Visual shiny spots with no detectable wear are OK. the direct piston. to the reverse circuit. for a pressure loss resulting in burnt 3rd gear clutches (Yes it has happened to me). I then slot the head of the bolt so I can use a flat-tip screwdriver. in front of the valve body and the seperator plate. This feed plate dual feeds the directs and plugging this hole is unnecessary. Also most manual valve bodies, trans-brakes, etc will have you omit the direct drum center seal and the sealing ring on the stator but plugging of this hole is also unnecessary due to the design of the seperator plate. plate and you will have greatly increased the torque capacity of a stock TH350 as well as gained a firmer shift. I recommend NOT modifying the 1-2 accumulator. Retain the cushion spring and do not block the circuit. The 2-3 accumulator can be blocked by several methods. the piston and the e-clip is the "shadetree' method. You can also block the feed in the valve body to the 2-3 accumulator. I use is a section of plastic cut from a 3 liter soda bottle to use as an outside installer tool. Set it in the drum, and it will force the lip seal into the drum without using a tool around the entire circumference. You may however need to work the exposed part of the seal into the drum with the feeler gauge or seal tool. If you slide around the drum, and it catches the seal it will cut it and then you must get a new lip seal and start again. Good lighting, patience, and technique are key here, oh, and a good air check |
|
#5
|
||||||
|
||||||
|
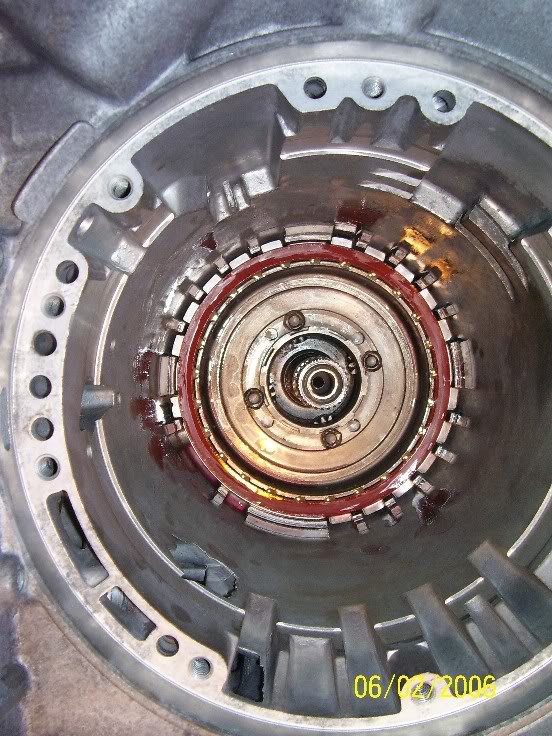
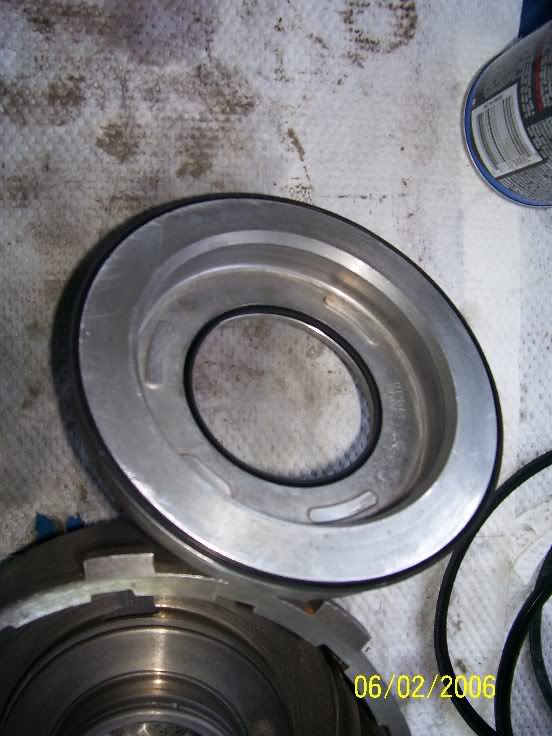
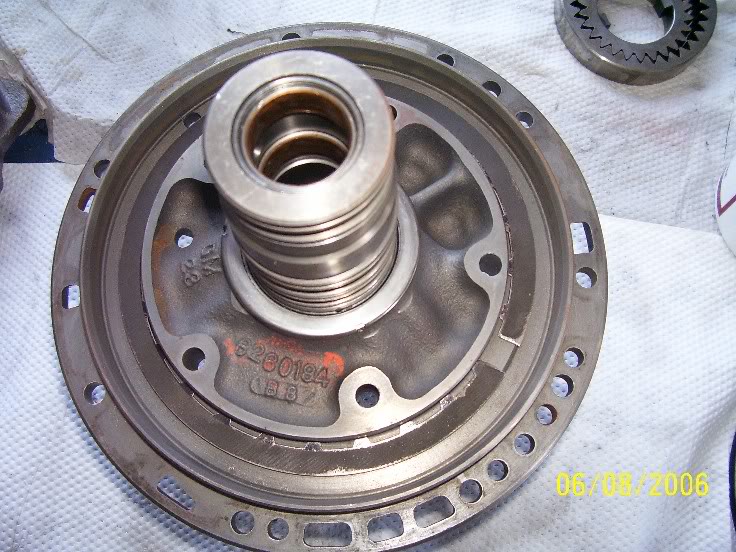
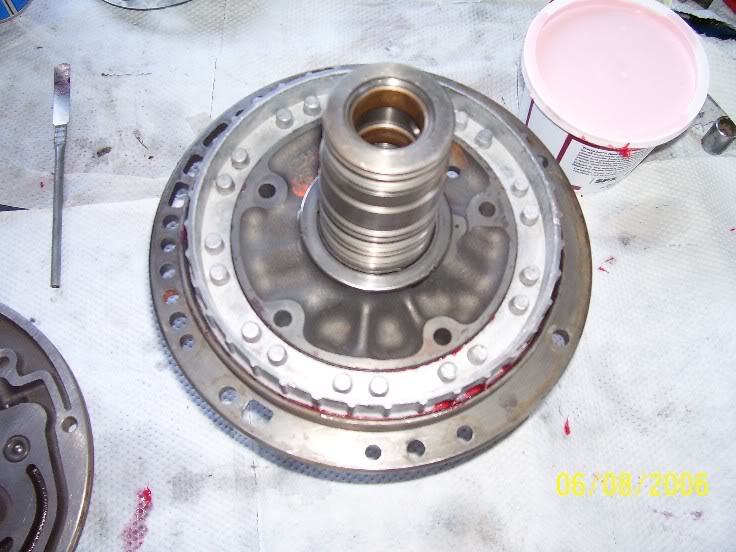
Forward drum procedures are almost identical. No center seal to worry about on a TH350, it typically already has a 5 clutch pack, except light duty applications. If too tight it can creep in neutral. Be sure it is smooth. Minor scoring can be smoothed down. This slightly tightens the intermediate clutch clearance to achieve cleaner 1-2 shift. Mis-installation will result in pump failure and converter damage. I place the drums on the pump (above a hole in the bench) with all sealing rings in place, thrust washers or bearings. As you apply air to the correct passages, you will see and hear the drums apply the clutches. Be sure there are no leaks from the lip seals. There will be some minor leakage at the sealing rings usually. Iron rings air check better than teflon on the bench. Ensure the lugs of the direct drum are engaged with the sun shell. They should be slightly below the top edge of the suin shell. If you do not get complete engagement, the input shaft will not turn when you install the pump and begin to tighten it. |
|
#6
|
||||||
|
||||||
|
The increase in pressure will cause the fluid to move faster and shifts to be firmer. This hole can be blocked but it is easier to block the passage in the VB or the 2-3 accumulator piston as previously mentioned |
|
#7
|
||||||
|
||||||
|
Jake, it's great to see you put this here! Are the others soon to come? which is destined for my buddys truck (he finally decided to give up on his 700 that kept crapping out on him). I installed the low/reverse retaining ring so it would hold the anti-clunk spring in place, just as the assembly manual said. The thing is though, the ring doesn't seat fully in it's groove in that area (spring is holding it back)... but seems pretty much seated all the way around. I went ahead and put everything else together... but stripped a pump bolt (doh!) buttoning it up. So, I have it partially apart right now so I can repair the threads. Should I do something about that snap ring while I have it apart? |
|
#8
|
||||||
|
||||||
|
I would have to see the snap ring, but it should cover the portion of the anti-clunk spring that is flat, but not the part that is turned sideways. |
|
#9
|
||||||
|
||||||
|
Quote:
with the snap ring, not just the flat portion. I fixed it to where the open end of the ring is over the bent side of the spring and all is well now. |
|
#10
|
||||||
|
||||||
|
Jakeshoe, Thanks for taking the time and post.Great thread.
 |
|
#11
|
||||||
|
||||||
|
This thread is locked at the present time to avoid spamming of it.
You can email jakeshoe or use the PM system on Hotrodders.
__________________
At the Bonneville Salt Flats... 130mph is known as First gear .............. People have issues .. cars have problems |
| Back to top |
| Currently Active Users Viewing This Thread: 1 (1 members and 0 guests) | |
| Richard A |
| Thread Tools | Search this Thread |
| Rate This Thread | |
|
|
|
|
||||
| Thread | Thread Starter | Forum | Replies | Last Post |
| good rebuild for th350 400hp+ | roy383ci | Transmission - Rearend | 11 | 06-10-2005 09:02 AM |
| Which rebuild kit? | leastbay | Engine | 7 | 12-20-2004 09:19 AM |
| Lincoln Tech School.. | Mightymouse | Hotrodders' Lounge | 4 | 11-15-2004 10:33 AM |
| th350 rebuild | b/w72 | Transmission - Rearend | 3 | 02-01-2003 11:53 PM |
| Advice on TH350 rebuild please. | F-1Rodder | Transmission - Rearend | 2 | 01-08-2003 01:35 PM |